Working with Natural Light
In the following chapter: "Working with light" we will explore using natural, flash light, both as main light sources and as fill. As well as spend some time in the Studio.
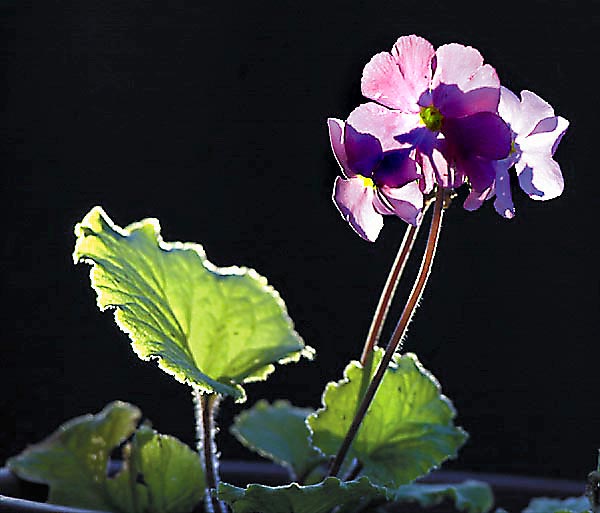
 | 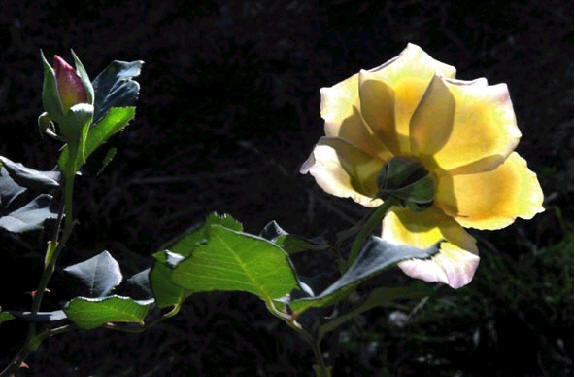 Both of these flowers photographs were taken early in the morning. The sun is low in the sky and the light is quite soft. By shooting into that light we achieve two goals. We can illustrate just how delicate and at times fragile plants can be, showing how translucent the petals are. We create a feel of depth in a two-dimensional medium using light and shade. Now while the sun is low in the sky, and much of the landscape is still in shadow, we utilize this simply backdrop to help us isolate and enhance the subject. The shadows replace the backdrops used in the studio! |
 | This photograph was taken with an 80mm lens shot at 25th sec f2.8. It was lit using a large window only. An overcast day provided a soft yet powerful light source. No other studio props were necessary! |
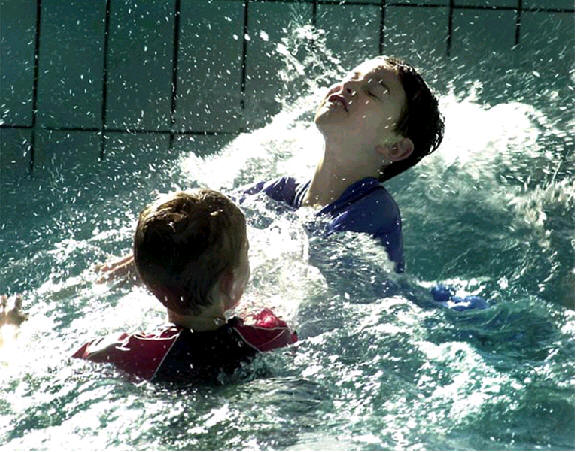 | This photograph was shot at 500th @f5.6 on 200asa. 200mm lens. Sunlight was from directly in front; the lens was however protected from glare by indoor trees. The high walls of the wave pool are in shadow, thus creating a pleasing contrast with the water. The high shutter speed stops the water motion as well. |
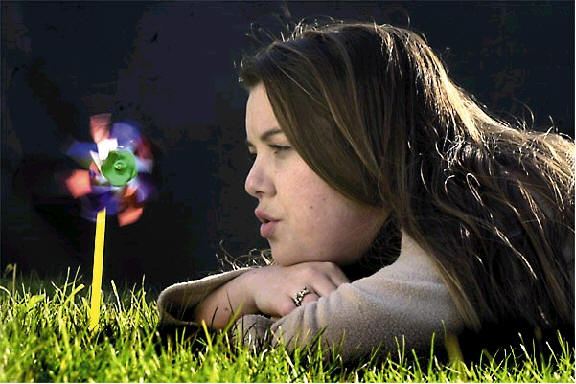
 | Again we can see the beauty of diffused window light. The Light was however controlled. Curtains on both sides of the full length window, helped darken the background and leave a narrow beam of light. No other light source or reflectors were needed. |
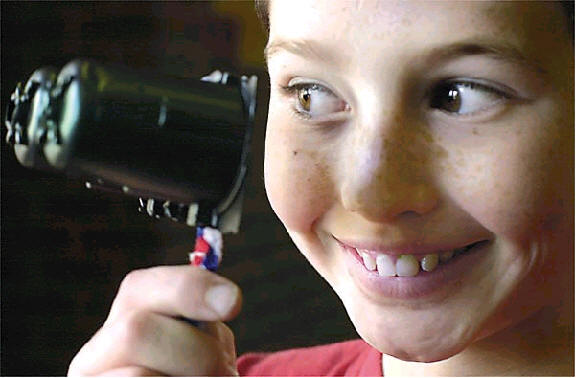
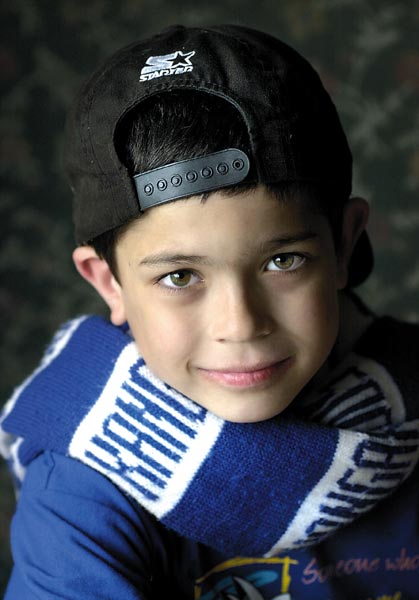 | Here we have a lighting technique rarely talked about in books or photographic magazines. Known as negative lighting, the idea is to remove excess or unwanted light. The child is lit using a large floor to ceiling window. However the soft light spilled over into the right side of the face. To help create a more moody image I placed a black piece of board close to the right side of the face, this absorbed the excess light and help create the shadows. |
 | This 4 inch high potted plant was photographed using a 300mm Lens. 250th sec @ F5.6 -200asa. This image was taken minutes before the sun set. The pot was placed on top a 4ft stepladder, so as to catch the now very low rays. The background is a fence 10ft (3m) away and in complete shadow. A wall to the left of the plant acted as protection against sun glare. A long lens was used to be able to get in close while physically being far away enough to hide from the near direct sun rays. |
 | The trick to successful child or animal photography is simple. Prepare everything before hand and then have lots and lots of patience. As with most situations try and see the final image in your minds eye. Know what it is you want first and then prepare your props and lighting accordingly. The photograph opposite was shot with available light (window light) Flash can startle small children or animals and quickly turn them into unwilling participants. Before you can start working with light effectively you will have to spend some time learning to "see light". Please continue below with the set assignments. |
