Studio
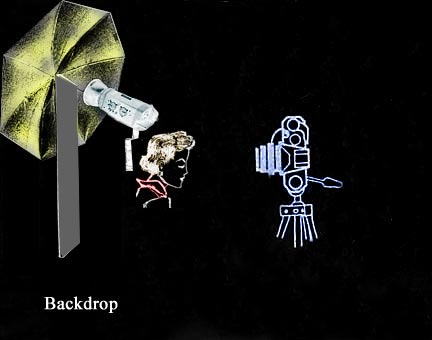
Remember that the concept of studio is not an exclusive indoor activity. There is no better training ground, for working in a studio than working outdoors, teaching you to see and control that one natural light source that we have, the sun. As studio work should be left to the more advanced student, we will explore only a few of the basic principals. One of the advantages we have with a studio is the total control over our light. We know what our light units can do, the power outputs, color and exposure. In short there should be no surprises as to the final outcome. How much room do I need? A four by four meter area is the minimum floor space for a comfortable work area. It gives you room for backdrops, lights and sufficient distance between you and your subjects. If you wish to turn your hand to portraiture photography, you will need a lens, usually ranging between 80-105mm. You will also need a couple of flash units. One unit and some reflectors will do at the start. If we are using two lights, one will be the fill light, while the other will be the main light. The fill light will be close to the camera and cover both sides of the face, while the main light will be off to one side
|
|
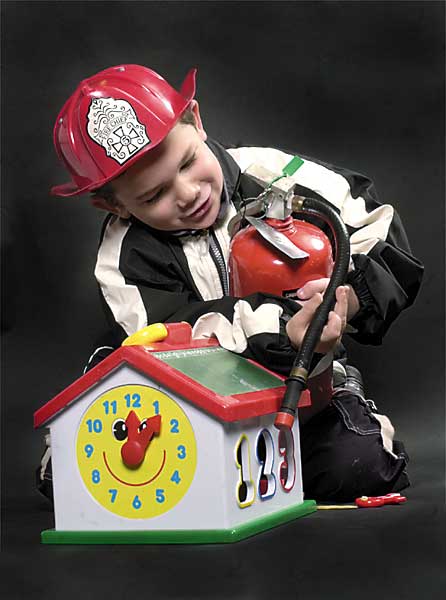 |
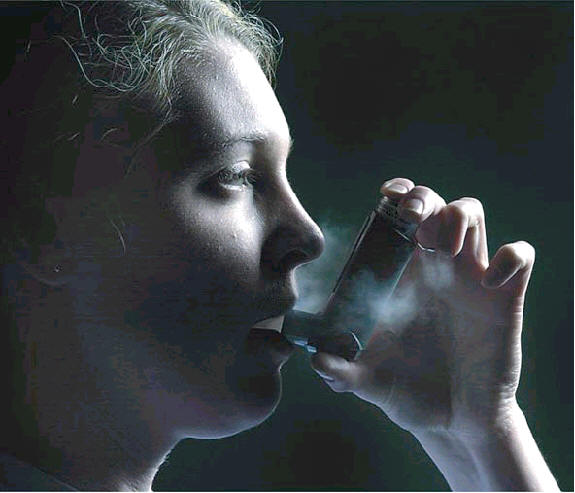
Here we have an example of the use of two flash units. The fill light was close to the camera and giving off two F stops less light then the main light, which was to the right and slightly to the back. (over the subject's left shoulder). |
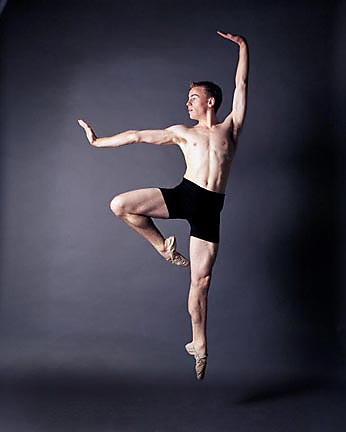 | A single flash unit to the left, was all that was required to produce this striking image. A sheet of black studio paper creates a seamless background. The shadows were manipulated in Photoshop to help separate the dancer from the background. |
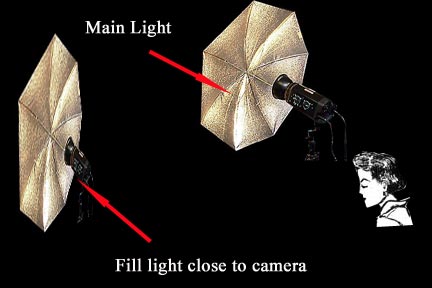 | If you are using flash units, then a flash meter will be a worthwhile investment. Now remember, we are trying to recreate nature, that is the sort of lighting we would have naturally outdoors or coming in through a large window. We don't want to be able to identify two light sources, ( We don't want to see two sets of shadows). We note that the light on the face is not even. One side is brighter than the other. So how do we recreate this in the studio? |
Before we can arrive at an answer, let us go back and recall the chapter on Apertures. You will remember that the aperture openings are so designed so to allow twice as much light in with every F stop. e.g.. when we moved from F16 to F11 we opened one stop, or allowed twice as much light in. From F11 to F8, again twice as much light at F8 then at F11, and so on down to F5.6, F4, F2.8, F2, F1.4. Each stop giving twice as much light as the last.
A light is 2 meters away from a subject and shines 100 units of light at that subject. If we now move that light to 4 meters from the subject, only 25 units of light will fall onto the subject. At 2.8 meters the subject gets 50 units of light.
Do the numbers 2, 2.8. 4. look familiar, of course they are the Aperture numbers. So if we have a light that is at 2 meters and we want to move it so it gives twice the amount of light, we move it one F stop in. So we go from the 2 meters to 1.4 meters. Lets do this again: We have a light that is 4 meters from a subject, we wish to double the light exposure, so we move the light until it's 2.8 meters away. If on the other hand if we wished to darken the subject we can move the light back to 5.6 meters.
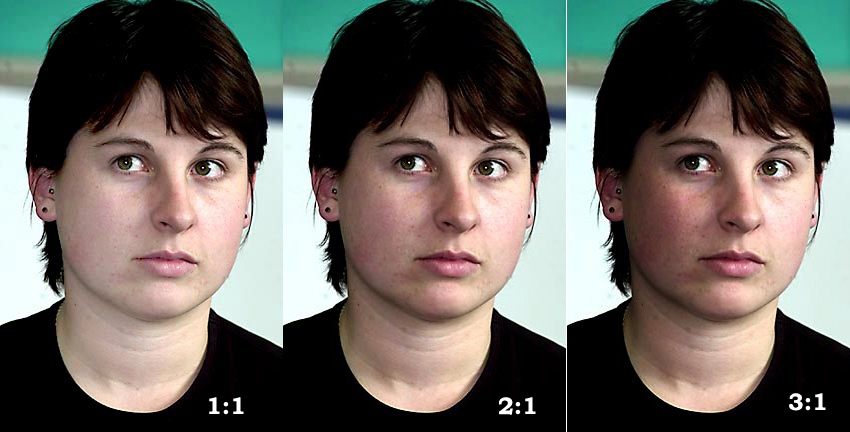
To increase the lighting ratio from 2:1 to 3:1 we move the main light from 2 meters back to 2.8 meters.
Lets do this again. The face has received 1 unit of light to both the left and right side, from the front fill-in light. The face has received 1 unit on the left side, from the main light. So we have 2 units on the left side and 1 unit of light on the right. The ratio is 2:1.
Now we move the front fill-in light back to 2.8 meters. Only half the light now reaches the face. Half a unit to the left, half a unit to the right. The main light still gives us 1 unit to the left. So we have 11/2 units to the left side and a 1/2 a unit to the right. This is our 3:1 ratio.
 |  |
 | A single flash unit to the right of the subject, mimics diffused daylight. A simple but effective technique. Well, I hope you have enjoyed this website, I hope to add more in the near future. Drop me a line and let me know what you think of this site and what I can do to make it better. |