Depth of Field
 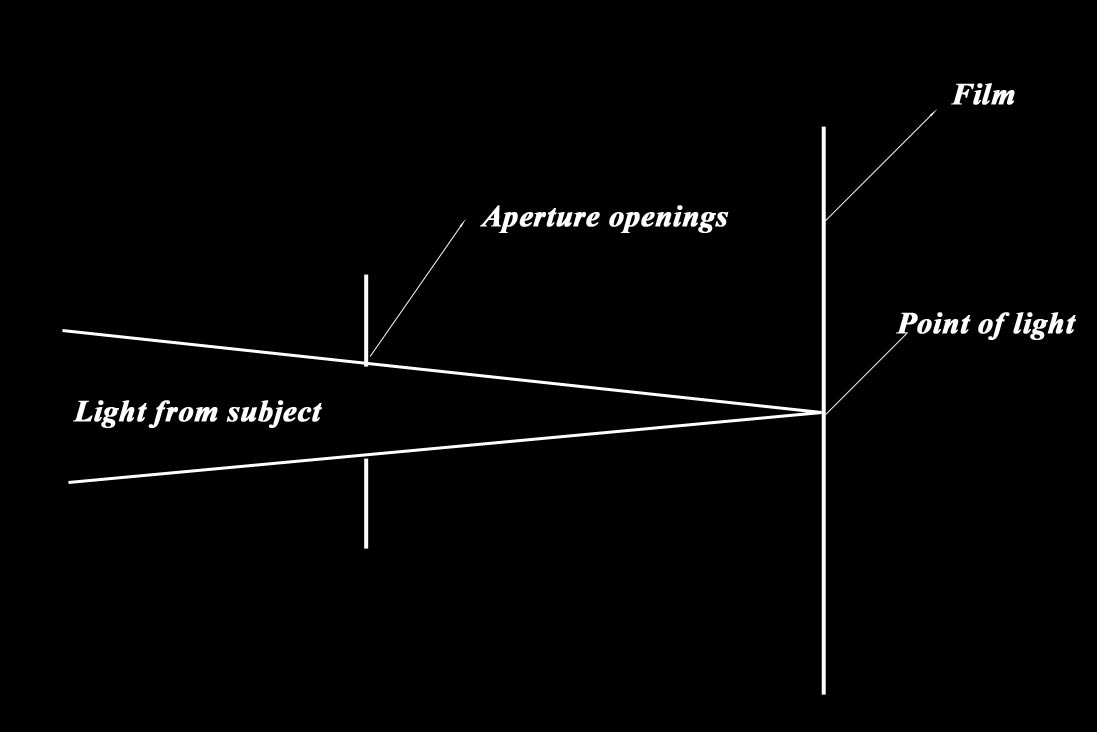 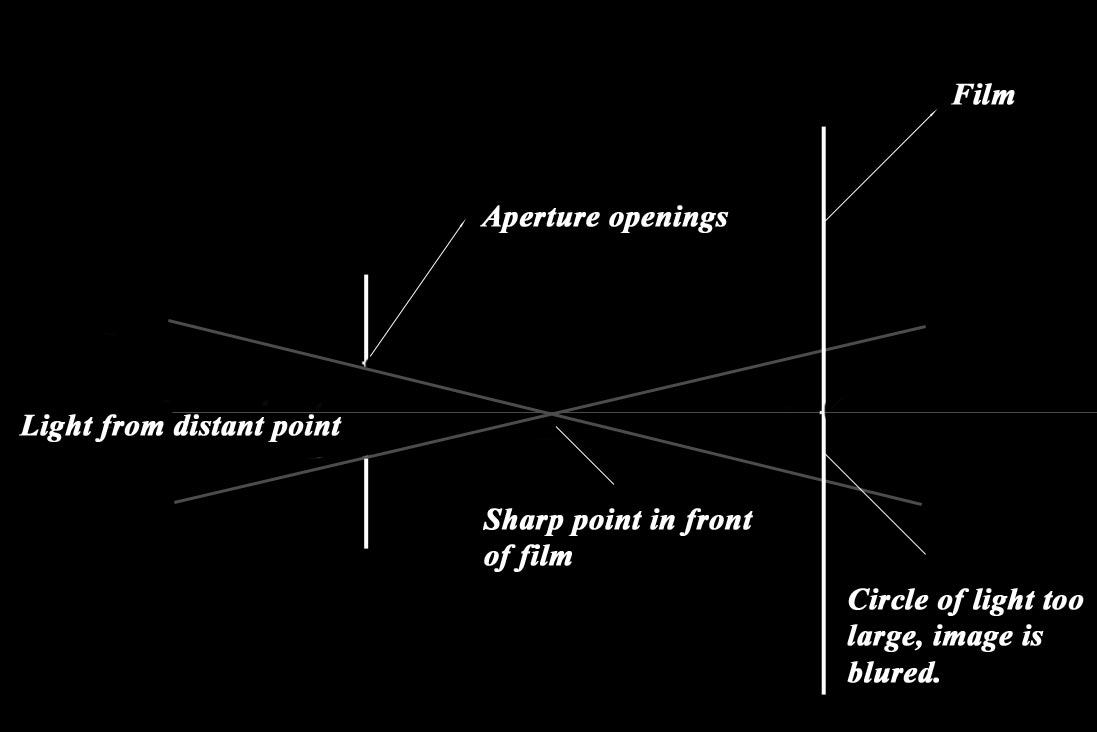 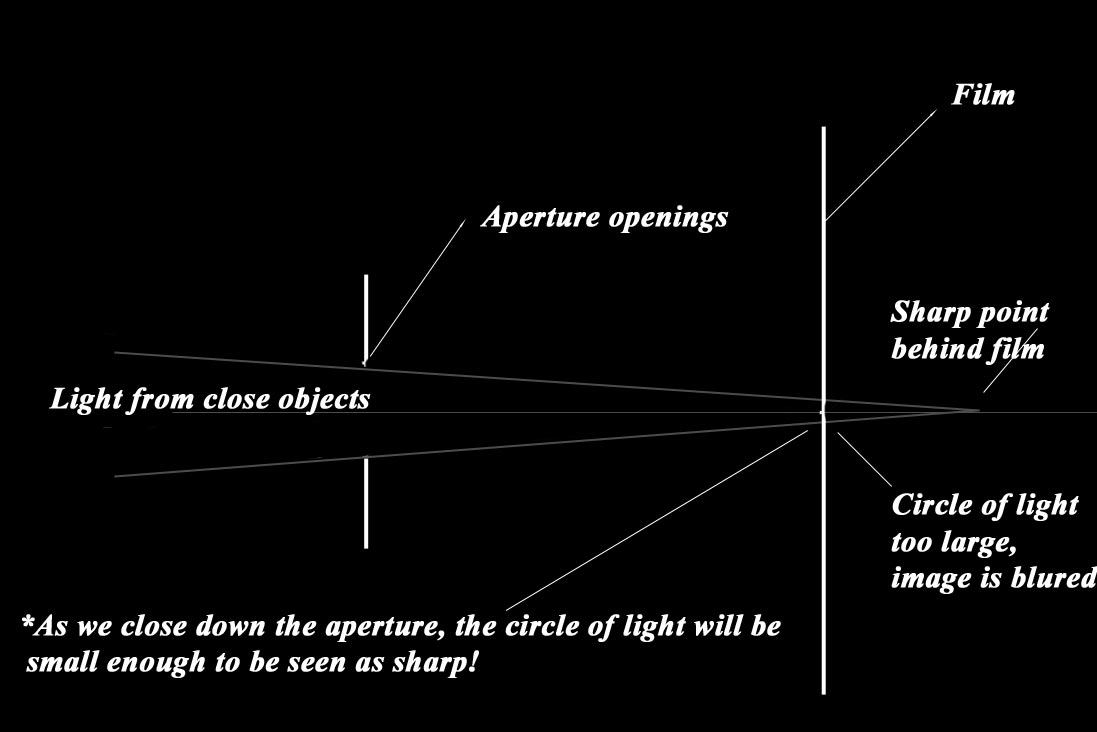 |
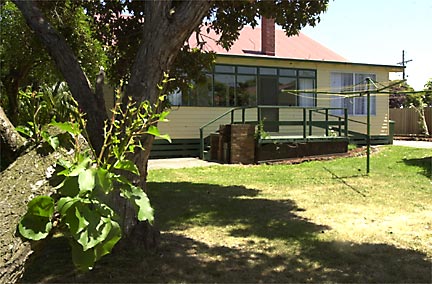
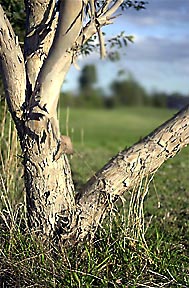
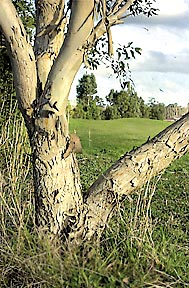
In this chapter we will look at "Depth of field", or more correctly "Depth of sharpness." This Depth of sharpness is a visual byproduct of our Aperture settings. Once we have focused on our subject, in this case the tree, (see left) we in fact have a certain amount of space in front and behind the focused subject that will be sharp. This space can be controlled by the aperture setting we choose to use, the focal length of our lens and by the proximity to our subject. In the photograph on the right the aperture setting was at F16. With such a small opening the depth of sharpness extends to trees in the background. However in the example on the left, the aperture setting was at F2. This large opening drastically reduces our depth of sharpness. How do apertures control depth of field? On a wall or board, draw a circle with a diameter of approximately a quarter of an inch (6mm). If you walk back far enough from the wall, you will reach a situation were you can't tell the difference between the circle and a point. The point represents sharpness, the circle blur. With this in mind, Now think of the light coming through the lens and focusing on the film/sensor, these being in the shape of a cone. The point of the cone is touching the film, the opening is on the lens. Now, the wider the aperture opening, the wider the open end of the cone. The smaller the opening of the aperture, the smaller the cone opening. The light from the subject we focus on, will always have the points of the cone on the film plane (see animation on left) What about subjects in front and behind? Images in front and behind will have their cone points before or behind the film/sensor base. On its own, Depth of field has no real significance. It really only comes into its own, when integrated into the concept of visual composition. Although both tree images at the top of the page are correctly exposed, they are visually and emotionally quite different. What do you think? |
| If we take a close look the two examples on the left, we will note the overall exposure for the two photographs were identical. However the aperture setting for the top image was at F2.8.While the bottom image was set at F22 Naturally, the shutter speeds were adjusted to insure correct exposure. As we will see in later lessons and in greater depth, in our chapter on composition, the sharp foreground acts as an entry point into the photograph for our viewers. From there, the viewer will travel diagonally to the main subject matter, in this case the house. The foreground though small in size acts well as a counter balance to the larger subject, due to its proximity to the lens. The image works, mainly because it takes the viewer on the journey through the photograph. In contrast, the top image's lack of depth of sharpness, sends the viewer directly to the main subject. The eye will not stop to take in an object that is out of focus. The result is an image that is both visually and emotionally quite different from the one above. How were the apertures used to help the photographer illustrate two different views of the decaying grandeur of the former Colonial era in Vietnam? What do you think the photographer was trying to tell us?
|