The Shutter and How to Control Movement
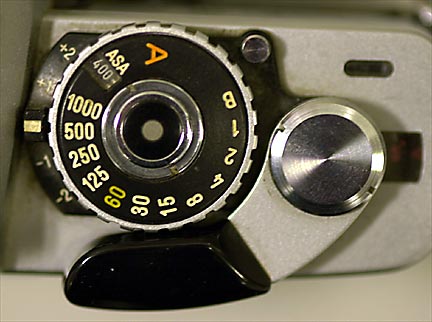
The Shutter control dial is usually situated on the top right hand side of
the camera. Looking at the
dial
, we will notice a series of numbers.
Notice how they double or half, just like the apertures.
8, 15, 30, 60, 125, 250, 500, 1000
These numbers are all parts of a second - 2 is in reality one half of a second. While 4 is one quarter of a second. 8 is an 8th sec and so on.
Just like our Apertures, the shutter control dial help us control exposure. It is however the Visual Byproduct of this control that will interest us the most. The second and equally important creative control we have as photographers is that of "Motion"
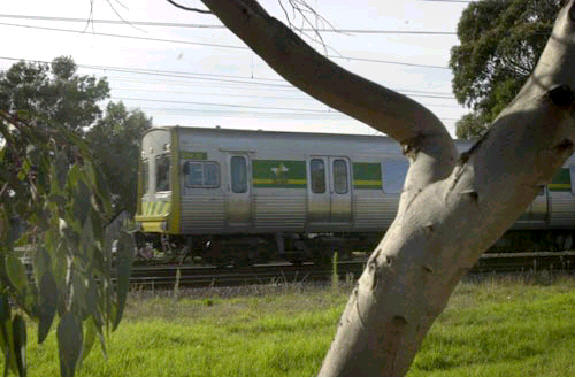 | 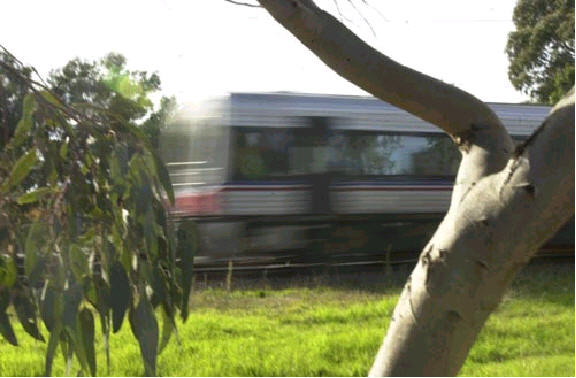 |
In the two examples above , we can see the effects
of a slow shutter speed (30th sec.). And a fast
shutter speed (500th sec.). We compensated with the apertures
to make sure both examples were correctly exposed. The train shot at 500th of a sec. might as well have been stationary, for at a high
shutter speed that is the visual result. Photographed at a low speed, the train is still
recognizable, but the illusion of motion is created. The train photos
should also be noted for their compositional value, note how the tree in
the foreground creates a feel of depth. This will be explored in our
chapter on composition.
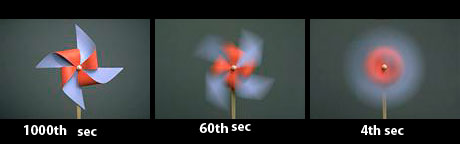
A simple experiment using a child's toy, to
illustrate the effects of shutter speeds on a moving object. The photo on the
far left, does not in any visual way convey the illusion of speed,
for all we know it wasn't moving at all! However by reducing our shutter speeds
we are able to communicate motion to the viewer quite easily.
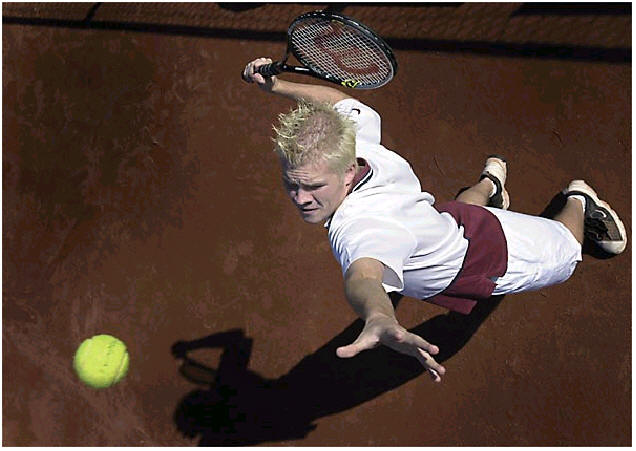
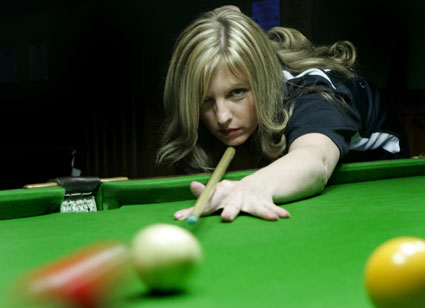
 | In the image left, the first consideration was to the shutter
speed. The aperture was then adjusted to insure correct exposure. In this example
the shutter speed and timing was crucial. A 135mm Lens
and 400ASA film, was used. Exposure was: 500th Sec. @ F8. Timing was
everything. It was the difference between getting the shot or not.
|
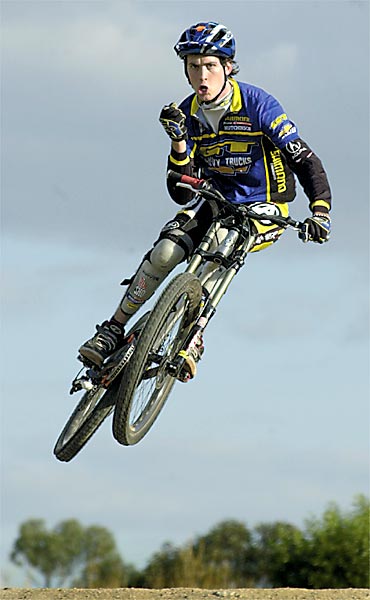
 | Again it’s
a question of using a high shutter speed, however timing and viewpoint make the shot. |
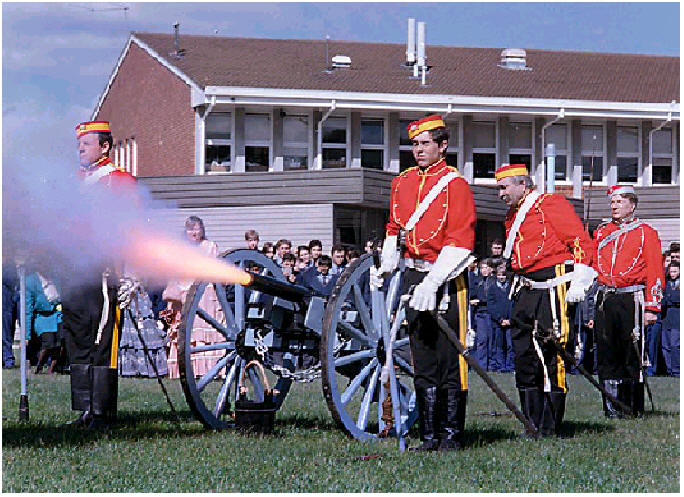
 | 500th sec. was required to "freeze" this shot.
A low angle, strong side light and long lens (300 mm) produces the classic
action shot. Timing and prefocusing (using the manual
focus setting), we focus and preframe on the spot we hope the action
will take place, then its just a matter of waiting and exposing at
the right time. |
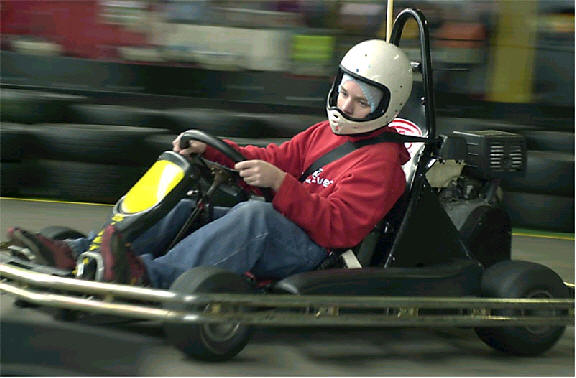 | The go-cart appears to be stationary. However on closer examination, we will notice that the background is blurred. The technique used here is known as panning. In most photographic situations the camera is stationary when an image is taken. In panning however the camera is on the move. The photographer waits for the racing car, horse or bike to enter the viewfinder and then moves the camera keeping the subject in view. If the speed of the moving object and the camera are matched, then the subject appears to be stationary, however because we took the exposure while the camera was moving the back and foreground will appear blurred. This technique is used with great success at many race meetings. The shutter speeds required to achieve this technique will depend on the focal length of your lens*
|
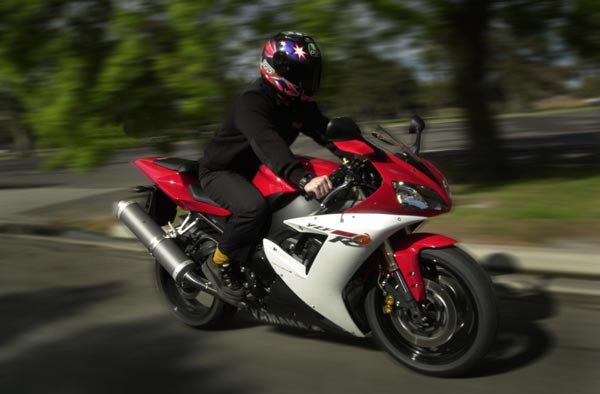 |
Here we have a variation on panning. The photographer is in a car, traveling at the same speed as the motor cyclist. By reducing the shutter speed to a 30th sec. we get a blurred background. |
 | Shooting at 1/4 of a second with the aperture closed down for good depth of field. |
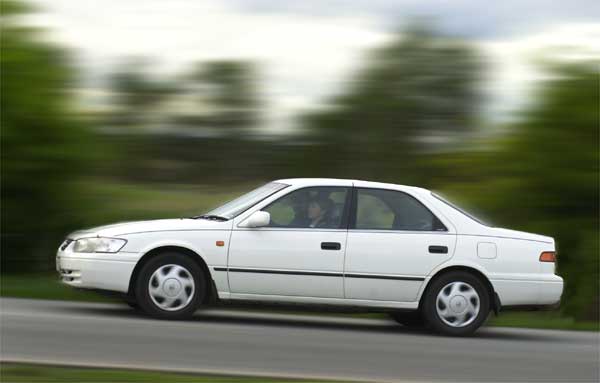 |  |
We can see how the above image is created. It is sometimes easier to focus on a spot on the road, and set your light meter before taking the photograph. Make sure that the run up, the exposure and follow through are as smooth as possible.
 | 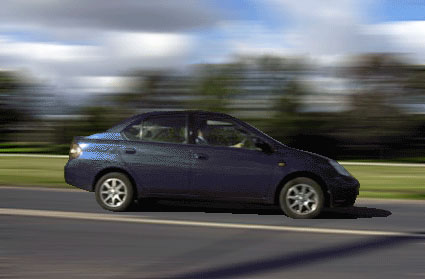 |
Which of the two backgrounds best conveys the feel of speed?
How are the different backgrounds achieved?
Click here to see a model of a shutter in action
Recapping
Under the lighting conditions, when the trains were photographed, at 200ASA.
1000th @ F4 is the same as
500th @ F 5.6 is the same as - Frozen train
250th @ F 8 is the same as
125th @ F11 is the same as
60th @ F 16 is the same as
30th @ F22 is the same as - blurred train
15th @ F32 etc....
So we can see, that at any given lighting situation, AND ASA-ISO, we have a series of exposures that we can chose from. We pick the one that best suits the image we wish to photograph.
So how do we decide what is "correct exposer" That we will see in our next chapter titled