The Light Meter

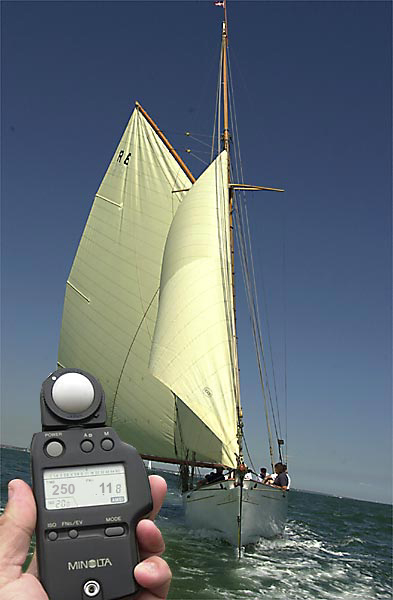
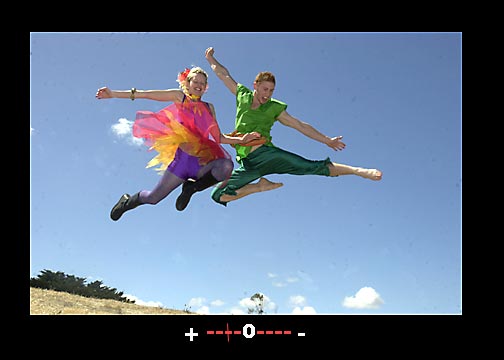
The light meter can be a most perplexing part of the camera to master. Amateurs and professionals alike struggle at times to establish correct exposure in complex lighting situations.

The most traditional way to use our built in light meter, is to simply point the lens at the subject and then choosing an aperture and shutter combination until "correct exposure" is determined. However this seemingly simply technique of aim-your camera-and-trust-the-meter method rarely satisfies the discerning photographer.

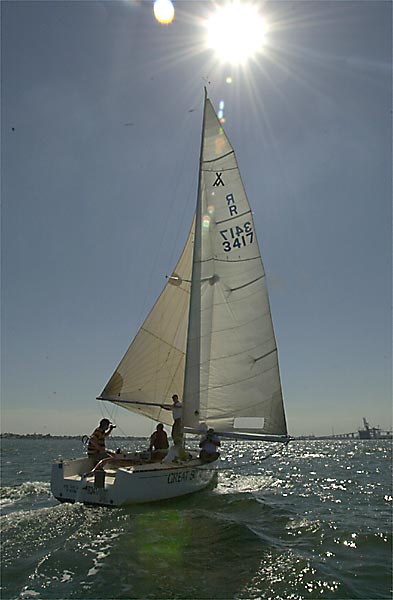
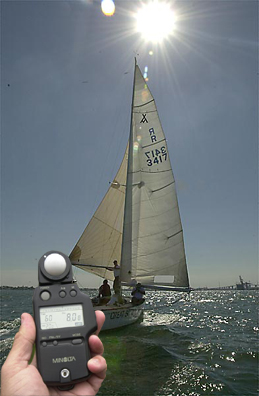
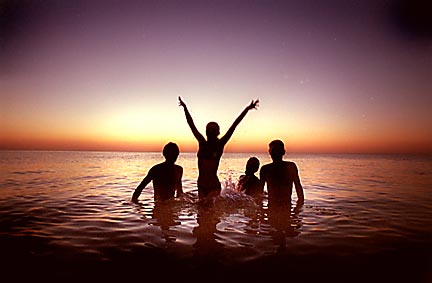
When a complex lighting situation arises, as with these photographs, (large areas of bright light,  in the sea and sky) we often need to find a different approach to insure we achieve correct exposure.

We know the importance of not dramatically  overexposing and losing detail in the highlights, in this case the sails. We also have to watch out not to underexpose and lose detail in our shadow areas. This is likely to happen in these types of situations, as the built in light meter will "see" large amounts of light reflecting from the sea and sky, and ask you to give less exposure than is really required thus resulting in underexposure, (silhouetted sailboats in extreme cases.)

A hand held incident light meter was used to determine exposure in this situation. To take an incident reading with a hand-held meter, you usually push a milk-colored plastic dome in front of the light-sensitive cell and point the meter away from the subject and toward the camera position. A cheaper and effective alternative is to simply read the light from the palm of your hand and open up one extra stop. Example: moving from F11 to F8. This is of course only true with Caucasian skin. For darker skin, meter reading off your palm should be correct exposure.In any case, for this method to work you must have your hand in the same light as your subject.


Here too we can use an Incident light meter or our hand. Another rather interesting concept used by old timers, works remarkably well. On sunny cloudless days with the sun at our backs, the correct exposure is: Your ASA @ f16. For this exercise, we will use a 200asa film. If the sun was at our back when we were photographing the boat our exposure would be 200th sec @ f16. (the speed is the same as the ASA) With the sun now to our left or right, the exposure will be doubled, to be set at 200th sec at f11. Looking into the sun, as with the photograph above, the exposure is doubled again, to  200th sec @ f8. 


To understand why these problems occur we need to have an understanding of how the meter "thinks"

1. The Camera is pointed at the scene.

  2. A range of tones are registered.

  3. An average grey tone is produced.

          (see animation on left)

This tone is then compared to an 18% grey. If the tone is lighter, then the meter sees it as an over exposure. If the tone is darker, then the meter sees it as an underexposure.


HTML clipboard


Here we have another example of the light meter "seeing" a large bright area. Setting the camera to point and shoot results in our main subject being underexposed.

HTML clipboard


Take a meter reading of your subject's skin tone and then open up one extra stop of light. 

HTML clipboard


There are situations when we will inevitably wish to break the rules to achieve a specific result. In "normal" shooting situations we would take a meter reading from our subject as described previously. However in this case the reading was taken from the sky and the resulting underexposure of our subjects has created a rather striking image.
So we can now understand that the meter only "sees" an 18% grey tone. It has been observed that when an "average"  scene  is reduced to a single tone of grey,  in most cases it resembles an 18% grey. The camera meter is calibrated to this 18% tone. When we point the camera at a scene such as the boat on the ocean, the overall grey tone is far lighter then the 18%. The camera's  meter will try to correct this by telling us to close down the exposure. example: go from F8 to F11. If on the other hand we were to be photographing in a dark forest, the overall grey tone would be darker then the designated 18%, and we would be "told" by the meter to open up and increase exposure. example: go from F5.6 to F4. Remember: The camera converts the scene that you have pointed the lens at and converts the light into a single grey tone. By knowing the meters limitations, we can better hope to achieve  "correct exposure"

                         Continue with the following chapter: